Easy steps to avoid water damaged walls
Water-resistive barriers (WRB’s) that keep the sheathing dry have been part of the residential building process since at least the late 1800’s, in the form of builders’ felt (aka tar paper). Synthetic WRB’s first arrived in the late 1960’s. Since then, lots of similar products have hit the market. Research and experience have also led to the development of what’s known as a rainscreen wall - a detail that creates a space between the siding and the WRB’s. The space is meant to prevent water that works its way behind the siding from leaking into the wall and damaging the sheathing. A rainscreen also allows a constant airflow that promotes drying and discourages the growth of mold and rot.
At one time, the adoption of a rainscreen wall was left up to the architect and/or builder, but as of 2015, the International Residential Code (IRC) requires rainscreen walls. “The exterior wall envelope shall be designed and constructed in such a manner as to prevent the accumulation of water within the wall assembly by providing a water-resistive barrier behind the exterior veneer, as described in Section 1404.2, and a means of draining water that enters the assembly to the exterior.” And while your region may not yet have adopted the 2015 code, it’s only a matter of time before rainscreens become required everywhere.
What’s your preferred method of building a rainscreen wall? Is it to apply your WRB of choice (builder’s felt, synthetic housewraps, etc.) to the sheathing, then nail up 5/8-in vertical strapping on 16-in centers? How do you detail the bottom and top of the rainscreen channels to keep out the tiny wildlife?
Or maybe you apply the WRB and then attach a mat of proprietary nylon mesh that forms the necessary hydroscopic break to keep the siding and the wall dry?
Perhaps you favor the all-in-one approach, and use a WRB that has an integral rainscreen? One version of this approach features a raised texture that’s incorporated into the housewrap. In theory, the texture creates an airspace, but that often doesn’t provide the amount of space needed to promote adequate drying. And there’s this, per example: If you’re building in Oregon, the state code specifies that the rainscreen create a minimum space of 3mm (1/8-in.), which could pose a problem for those want to use the textured WRB’s.
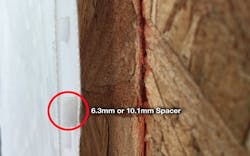
Or how about this? An all-in-one rainscreen and WRB - a tough, synthetic 19-perm WRB covered by a 6.3mm (1/4-in.)-thick rainscreen assembly. Senior architect Joe Fong AIA / NCARB / RID / LEED AP BD+C, a building envelope specialist at Tamlyn says that they have developed this new rainscreen 6.3 that will be market ready soon. To be available in 5 ft. by 50 ft. rolls, the material is uncompressible, needs no additional detailing at the top and bottom, has a 96% drainage capability and a UV-resistance maximum of 120 days. Unroll it, cap-staple it to the sheathing, and you’re done. Seams are sealed with a proprietary tape; openings should be flashed and windows installed before the rainscreen is attached. Tamlyn is also manufacturing a 10.1mm-thick product to satisfy Canadian building codes.
To learn more about TamlynWrap Rainscreen or to find a distributor, go to Tamlyn.com.


